Fall 2011 to Spring 2012
Fall 2012 to Spring 2013
Fall 2013 to Spring 2014
Fall 2014 to Spring 2015
Waltham, Northeast Elementary School, Grades 4 & 5 (Special needs)
We worked with five 4th and 5th graders in a special needs class at Northeast Elementary School in Waltham. We visited the school three times during the year: late Fall for three days, focusing on multiplication and division; early Spring for eight days, focusing on multiplication with arrays, four without tablets; and late Spring for four days, focusing on money and division with remainders.
The class is designated for students of “low cognitive abilities”. At least one of the five students we worked with had limited knowledge of English, and three had focus and attentional difficulties. The major goal of the sessions was to expose the students to the operations of multiplication and division through the tools designed for the tablets, namely stamps and arrays. The project also conducted a few sessions on money, which included coin identification and computation of different values of coins.
With each topic, the sessions followed a progression from working with concrete objects to pictorial representations (on paper and then with the tablets), and finally some abstract work, particularly with arrays. Taking the time to complete this developmental sequence was crucial to the students’ grasp of the ideas.
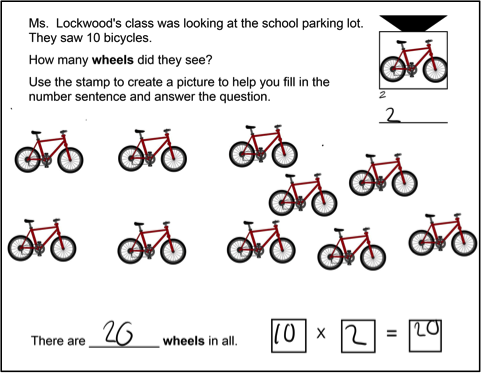
The first session focused on using stamps for multiplication and division. Most of the class was familiar with the stamps from the previous year, but the sessions were also designed with a specific progression. First, students solved multiplication problems with stamps containing premade images, as shown in Figure 1.
Figure 1: Student notebook page showing use of a premade stamp
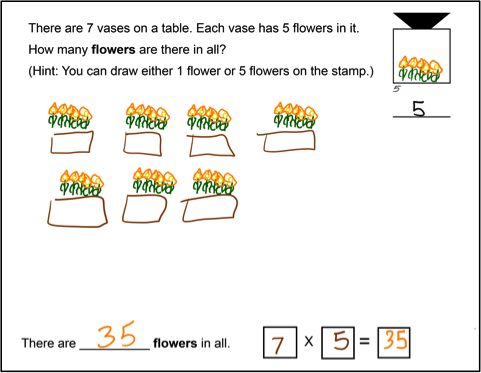
Then the students solved problems using a blank stamp on which they drew one object, as shown in Figure 2a. With multiple objects in a problem, such as several flowers in a single vase, the students learned to unitize, drawing multiple objects on a single stamp. The stamp of multiple flowers shown in Figure 2b was created by the same student who drew a single flower on a stamp in Figure 2a. In problems involving stamps, the students entered a number below each of their stamps to indicate how many objects were being represented on the stamp. This number entry served two purposes: It focused student attention on the meaning of each stamp, and it facilitated machine interpretation of student work.
Figure 2a. A student drew a single object drawn on a stamp for this problem
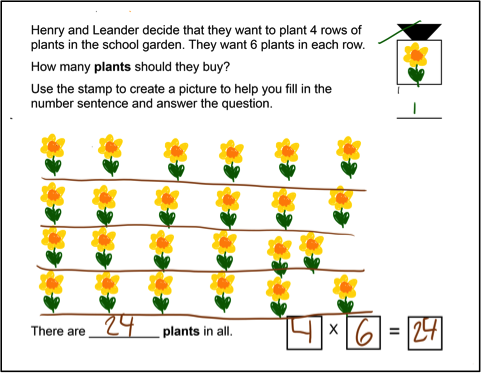
Figure 2b. Same student drew multiple odjects on a stamp for a later problem
Some students solved problems by skip-counting, e.g., a student who had just been introduced to multiplication. This student solved problems that were adjusted for her level of knowledge, as shown in Figure 3a. She started by drawing single objects on her stamps, but later demonstrated an ability to unitize by drawing two objects on a stamp, as shown in Figure 3b.
Figure 3a. A struggling student drew a single object on a stamp and skip-counted
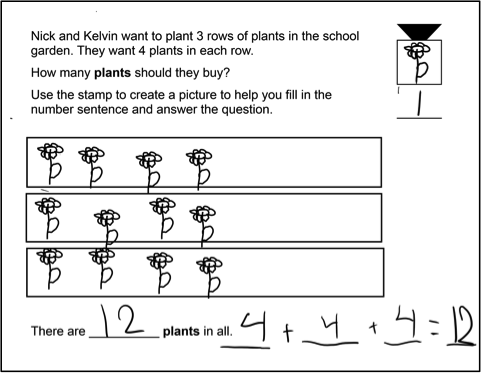
Figure 3b. She later showed improvement by drawing two objects on a stamp

Some problems required students to use stamps to represent smaller multiplication problems that were then to be added up, as shown in Figure 4.
Figure 4: Adding the results of smaller multiplication problems

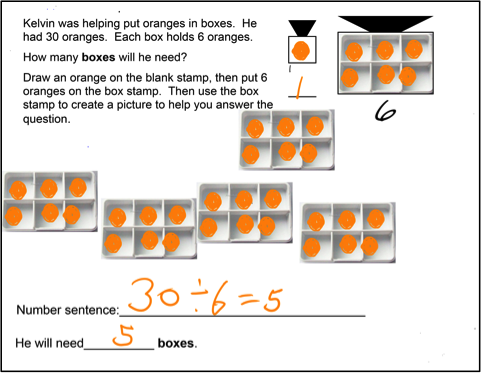
With division problems, the instructional sequence began with premade groups. A premade image represented a container, e.g., bag, or box, and students drew the object to be counted on a second stamp and “dealt” objects into the container. See Figure 5a. For other problems, students were provided a container with premade divisions, e.g., an orange crate. For these problems, students drew the object to be counted on a second stamp and “put it in” the container stamp, then made copies of the container with the objects. The software automatically incremented the number of objects “in” the container. See Figure 5b.
Figure 5a. Given the images of bags, students drew an object on the stamp and "dealt" out copies to solve the problem
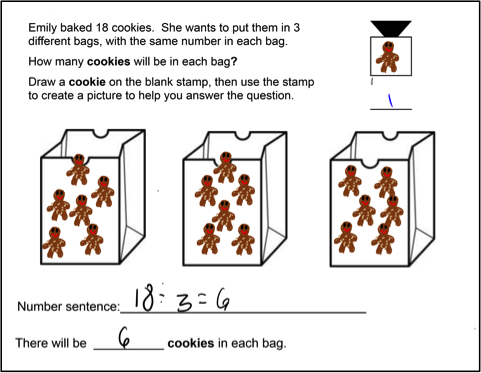
Figure 5b. In other problems, students drew an object on a stamp, made copies on a container stamp, then made copies of the container plus objects
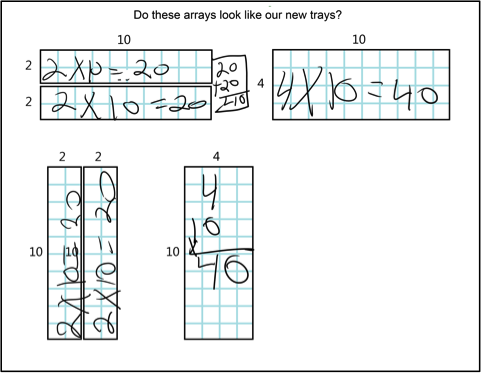
The second session several months later focused on introducing the students to the concept of arrays. When introducing arrays, the session began with a context that was familiar to the class—planting a garden with actual peat pots in rows. Once students completed these problems, they moved on to arrays with drawings of flowers or vegetables that they had actually planted. Finally, students were able to combine smaller arrays into larger ones. Again the instructional sequence moved the students from concrete (actual peat pots), through a pictorial representation (using stamps to overlay images of plants on an array), then to an abstract representation (arrays alone). See Figures 3-6a through 3-6d for one such sequence.
Figure 6a. Moving from concrete to more abstract
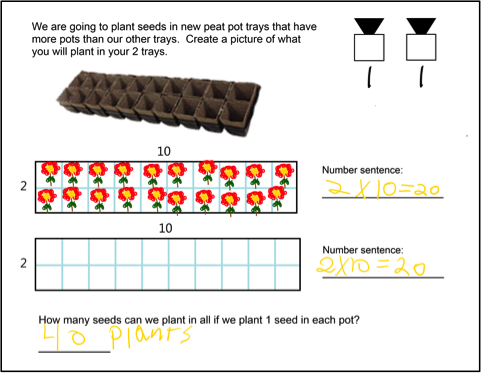
Figure 6b. Continuing to become more abstract
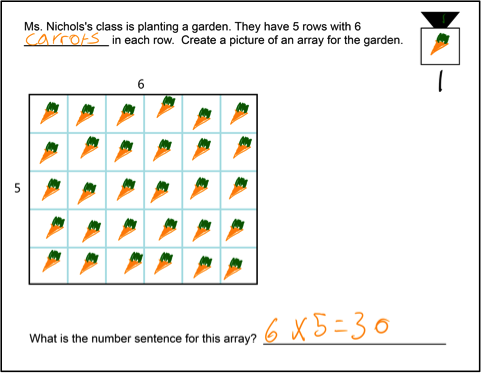
Figure 6c. Learning to combine arrays concretely
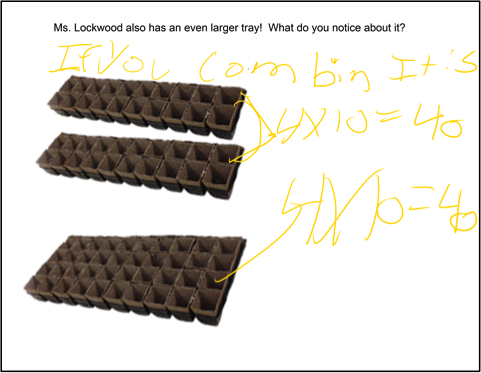
Figure 6d. Moving from concrete to abstract in combining arrays
In another sequence, students were introduced to the idea of combining arrays: They started with physical cupcake trays, used stamps on the tablets to overlay images of cupcakes onto arrays that represented the trays, then moved two smaller arrays onto a larger one. The version of the software used for this sequence recorded student interactions with the tablet so that when students submitted their work to the teacher, she was to “play” the movement of the arrays. (The students thoroughly enjoyed seeing their “creations” move.) See Figures 7a and 7b for the start and end states of one student moving arrays.
Figure 7a. Starting state for array combination problem
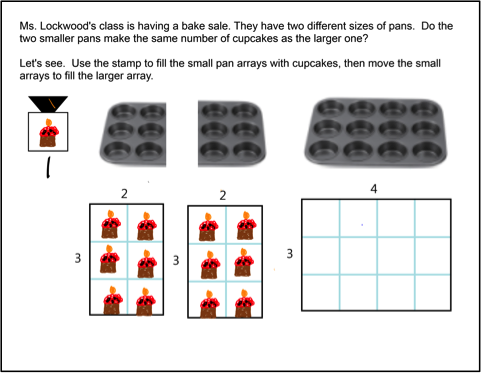
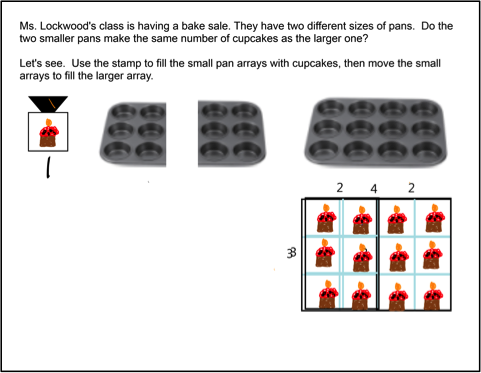
Figure 7b. Ending state: student moved smaller arrays onto 1 larger one
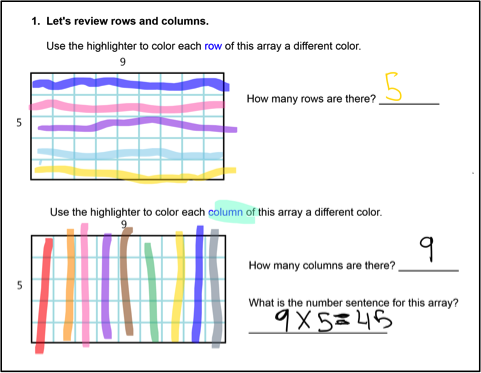
Being able to use a highlighter feature helped reinforce the concepts for some students. For example, one student who was just learning to skip count used the color to highlight each row of the array. See Figure 8.
Figure 8: Using highlighting effectively
During the late spring session, the software included a cutting tool so that arrays could be cut into smaller parts. Time did not allow a great deal of practice with this tool, but some students were able to grasp that they were cutting or dividing the array into equal parts. This version of the software also enabled students to record their interactions to create an animation. (In the previous version of the software, interactions were recorded “behind the scenes”, and students did not explicitly control which interactions were to be played back.) Several stages of one students animation created for a division with remainders problem is shown in Figures 9a through 9c.
Figure 9a: Starting state of division with remainders problem
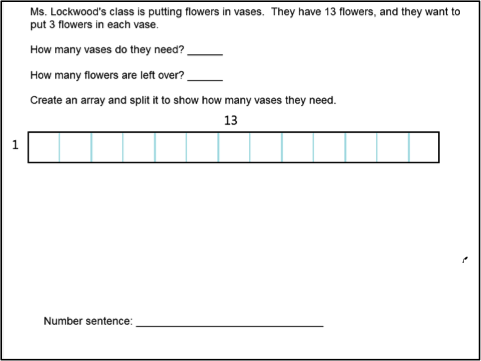
Figure 9b. Student cut the array to represent division and moved the smaller arrays
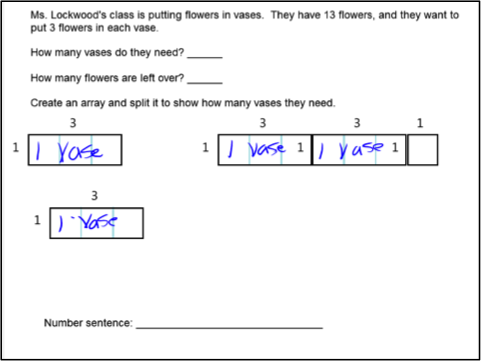
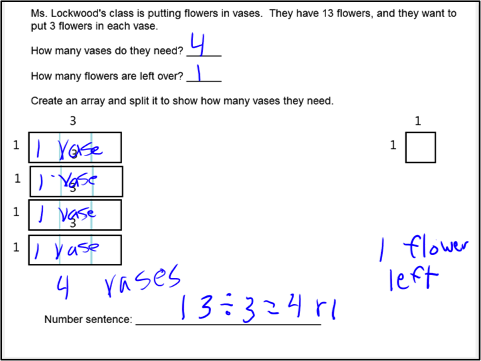
Figure 9c. Ending state makes remainder very visible
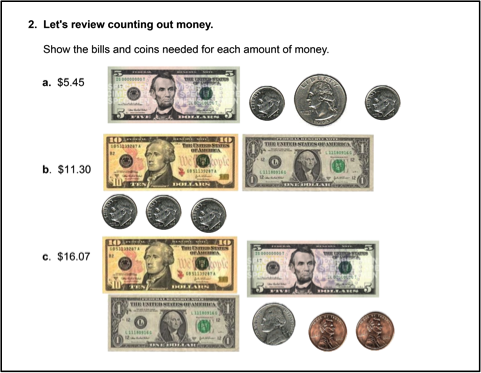
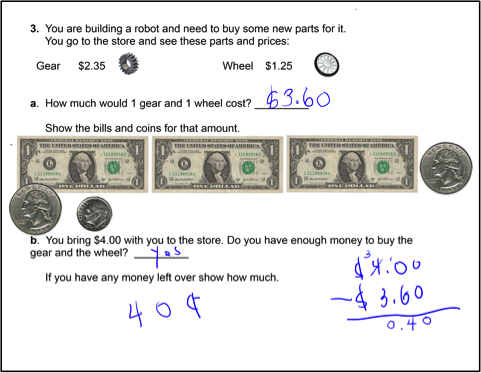
Finally, the team prepared a few lessons on coin identification and problem solving at the teacher’s request. The coin images on the tablet were more accurate than “play money”, and students were able to identify coins, and add together the value of multiple coins. They had difficulty solving “making change” problems on the tablet, and there was not enough time to explore this further. See Figure 10 for examples of student work.
Figure 10: Money problems; the student whose work is shown on the right had difficulty with the subtraction and required teacher assistance
The teacher and the math coach were impressed with what the students were able to do with the tablets. They especially found the tablets beneficial for the pictorial stage of instruction. Some students because of attentional difficulties would become distracted by manipulatives. The tablets allowed them to manipulate things visually, and engage actively in their learning, but still hold their attention. For those with focusing problems, working at their own pace on the tablets provided another advantage. She also found it helpful that she could adjust problems for each student’s level of understanding.
For assessment purposes, the teacher found that the tablets made her students’ thinking visible. She and they had a record of their work, so that she could review it to see what students knew and what they needed to practice, and they could make connections from prior work. Because the students took the alternative state math exam, MCAS (Massachusetts Comprehensive Assessment System), she was able to use the student work from the tablets for their portfolios.